Pages

Tuesday, January 29, 2013

Compare & Contrast..an integrated approach

Integration...a big idea.  In the past, I have thought of integration as a form of connecting topics or themes across content areas.  Think about teaching Ecosystems and reading about animals, using animals to measure or do math, as well as learning about it in science. That's really more like Cross Curricular, isn't it?

But Integration is when we teach thinking ideas or structures in all areas of your curriculum.  For example, we are learning about compare and contrast this month.  How are we doing this?

First we introduced the concept of Compare and Contrast as a whole group using photos of colonial Virginia houses based on architecture of German and English settlers.  By observing the pictures, students were able to notice what was similar and different.

Then we introduced the signal words: Compare (how they are alike) and Contrast (how they are different).  Signal words for compare: also, both, too, similar, the same as,more, like, as well as, alike. Signal words for contrast: but, however, too, different, from, compared to, in contrast, unlike, less.

We purposefully integrated this skill of compare and contrast into everything we did - Social studies, math, reading and science.


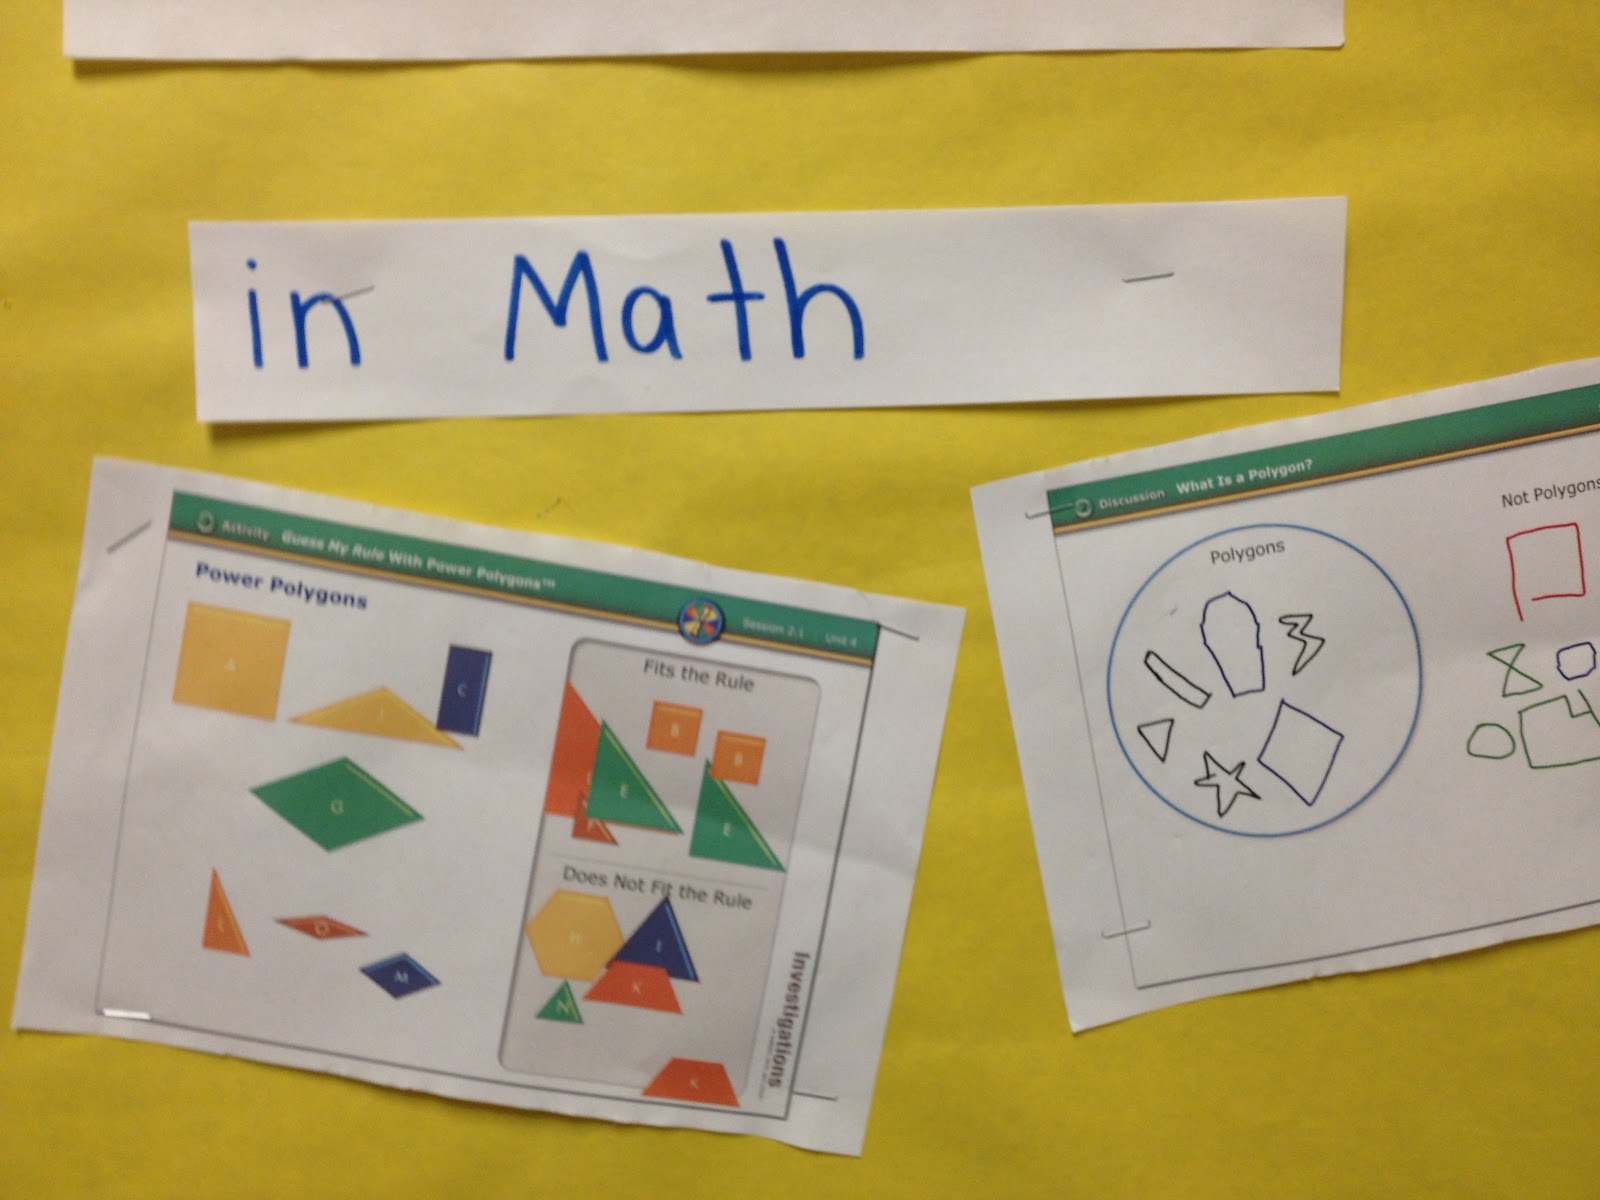
In Math, we are teaching polygons.  As part of this unit, we were able to sort and classify polygons based on common attributes.  We were able to manipulate the polygon shapes with a partner, play guess my rule, and sort shapes on the Smart Board.  When we compared the shapes we used the signal words to talk about similarities and differences. 
 
In reading, we compared and contrasted character traits in our Trickster Tales from around the world.  How was Brer Rabbit like Anansi? How were they different? We read non-fiction selections about seals and sea lions and compared how they behave in the wild. We circled signal words that we could find in the passage.  Compare words were pink (as was the compare statement area). Contrast words were in purple (and so wat the contrast statement area.)
 
In Science...we compared and contrast force and motion concepts with exit cards:  How are pushes and pulls alike? Different? Rollercoasters vs. Ramps & Cars, Rube Goldberg vs. Roller coasters, Kinetic vs. Potential....
I am offering this resource for FREE. Click here to get it - I put two cards on a page for a total of 8 exit cards. Enjoy it!


Roller Coaster Extensions

Roller coaster designs....you have read that I begin my force and motion unit using the lessons created by Karen Ansberry and Emily Morgan in More Picture Perfect Science Lessons.  But what comes next?  I felt like I needed to extend the unit more - to cover other concepts besides pushes and pulls.

First, I wanted students to test and explore how to increase a marble's speed by changing the hill height.
Next, I wanted students to explore what happens when you change the mass of the marble. 


So we used four different marble sized balls - one of play dough, one with texture and one metal ball bearing.


We weighed the mass of each ball before we experimented on our roller coaster tubes. The children were able to record true data that measured time and mass.

But what next???? I wanted students to learn how to write better conclusions, so I created several cards with their individual conclusions.  The students were able to analyze the responses and decide which were clear, which were confusing and how they could make it better.

After that, I integrated writing by having the students write directions for how to create a roller coaster and to describe the motion of the marble. I also had them draw a diagram showing the forces and motions labeled on the design.

I have created these extensions in a document to sell on TPT.  If you would like them, please visit the store!


Comment:

Sunday, January 20, 2013

Rube Goldberg Design Brief

I am so excited about our next engineering project in our STEM related curriculum.  We made Rube Goldberg machines!

First, there are some excellent interactive computer programs that your students can do either at home or at school. I found it interesting to watch my students complete these tasks...at first, they were impatient because it takes thinking to solve the tasks.  But with patience and testing again and again, they were able to solve the puzzle.

The first one is from FOSS (of course)....You get to manipulate the different parts of the machine to catch a burglar.


The other one is from Zoom with PBS.  This one has more parts in the contraption, but it is really fun.  When you finish it, the skateboard delivers lunch to the crew!


Next I presented them with a design brief - You can purchase this design brief at Teachers Pay Teachers if you would like your own copy! 
The students spent a day in their science groups planning what materials they would use to create their own Rube Goldberg machines.


The next day, the students built their machines and I video taped their trials.


When we finished, the students reflected on what went well, what they would improve next time and drew a diagram of their redesigns.  It was a really cool experiment - I have kept the materials in the classroom for students to build during inside recess.  Some have even asked to try to create them outside during recess as well.  Good luck - I hope you try it too!


Comment:


Sunday, January 13, 2013

Flipped Classroom

This year my colleague and I have been working on the idea of the Flipped Classroom.  Do you know what that is? It's an idea where instead of content lectures in class, they are presented with content material at home.  The idea is to "flip" lectures, so that there is more time for exploration and investigations in class

I have never really been a "lecture" teacher - but, truth be told...we do need to teach content.  In the past, I have spent time introducing content through non-fiction books, content charts, diagrams on chart paper, and through videos.  All of these methods I still use, however, now I have also added the blog idea for homework.

We started this idea of flipping by subscribing to a very well known "flip" resource that my son was using in high school.  I thought...why not!  Well, it didn't work for us...within one hour of the  site going live we had over 200 comments from our students.  They were using it as a social outlet - since they are too young for Facebook!  Yikes! That was not our intention...parents were not happy and so we stopped it at once. (Disclaimer:  this was our experience and you may not have the same results)

We came back to the drawing board and agreed on a more controlled approach to this model.  Since I was familiar with blogger, I knew that we could easily set up a site for them to access at home.  My younger son is in fourth grade and so we practiced with him first, to make sure it was easy to use. When the second site went live, we had no problems! Phew!

How do we use our blog? We assign it for homework the night before a new concept. This way, the children are introduced to new content before class.  It allows us to start our lessons by reviewing the content from the night before.  We usually assign a reflective piece for them to record - sometimes on a graphic organizer, sometimes in their notebooks.  We have created a few of our own videos, but we are both a little nervous about videoing ourselves.  Most of the videos come from YouTube - but because we can embed them in the current blog we can control what they see.

What about those kids who don't have access? We have a set time at the end of the day for homework.  Those students who do not have computer access at home are able to watch it on laptops if we have them that day, or one of the teachers will put it on the projector for those who want to watch before going home.

Any other tips? We created a QR code for smartphones.  Did you know that even if people do not have a computer at home, they are likely to have a smart phone? In poverty stricken homes, research shows that 80% have smart phones while less are found in middle income house (75%).

Positives? The response has been really good.  The kids like it and the teachers share the responsibilities.  Another positive? When it is time to review for a test they have all the content videos available at home to review.

What are we looking to add?  Choice.  The more we are into it, the more we know we need to offer up some choices.  While many kids learn by videos, just as many would learn by having an interactive computer game (there are many new tutoring type clips out there) or even visuals and vocabulary.  We have a lot to learn as we move forward!

If you would like to check it out, you can visit it here. 
We are open to any suggestions you may have!


Comment:

Tuesday, January 8, 2013

Rube Goldberg Machines

Do you remember playing Mousetrap as a child? I loved the idea of setting up the trap and watching it fall into place....


Can you even find them anymore? 
Little did I know that I was building my own "Rube Goldberg" Machine. With the onset of YouTube in the classroom, I have fallen in love with sharing these machines with my students.


My classroom full of future engineers and kinesthetic learners have fallen in love with them too.  Here's a great Mythbusters video for the holidays (wish I had seen it last month!)
 
Stay tuned for how my kids made their own versions in science class!


Comment:

Wednesday, January 2, 2013

Force and Motion - Rollercoasters!

More Picture Perfect Science Lessons: Using Children's Books to Guide Inquiry, K-4 (PB186X2)Every year we use foam tubes and marbles to teach the concept of force and motion using the lesson plans created by Karen Ansberry and Emily Morgan.  Have you read the book More Picture Perfect Science Lessons? or the sister book Picture Perfect Science Lessons? Both of these books include science lessons based on children's literature in a meaningful context - based on the 5 E's of Inquiry. You can buy them at NSTA or Amazon for about $36.  They are well worth the money!

Recently...I was browsing YouTube and found an excellent explanation of this same lesson that we do each year that was taped in Kansas City.  The teacher does a great job of explaining what she is doing and why she is doing it.  She explains the 5 E's - Engage, Explore, Explain, Extend and Evaluate

It is a perfect example of the program with great modeling by the teacher.  I enjoyed seeing her cute additions to the lesson - the kids wear lab coats and safety goggles! She also had some cute visuals of expressions kids may make when riding on a roller coaster. I hope you will check it out and see a great way to introduce a rather difficult science concept. 


Comment: